Max for all presents
3ds max from scratch series at http://maxtutrs.blogspot.com/
Now we know how to use the numeric boxes in transforming objects, but what if the object ( the chair for example ) is ( -175.963 ) on ( x ) and
(-255.308 ) on ( y ) and (94.069 ) on ( z ) and we want to move it ( 225 ) unit on X and ( -120 ) on y and ( 100 ) on z.
There’re two ways to do that :-
- bring a math teacher.
- Or click on this small button which called absolute mode transform type-in.
once you click on this button the axis numbers will become ( 0 ) which means that where ever the object the axis will stay ( 0 ) so you can type the number you want the object to move without calculations.
So If you want to move the object ( the chair in this example ) ( 225 ) units on X and ( -120 ) on y and ( 100 ) on z, just type these numbers in the numeric boxes.
When we move the object we move it on the existing axis but when we choose another object and its directions are different we found the axis still pointing to the same directions of the other object.
So why is that? And what if I want to move the object to its right or up or back?
If you look beside the scale tool you’ll find a list called reference coordinate system.
the default of this list is ( view ) and this explains why the axis are looks for one direction, that because the reference coordinate is the view.
This answers the first question and let’s understand it clearly.
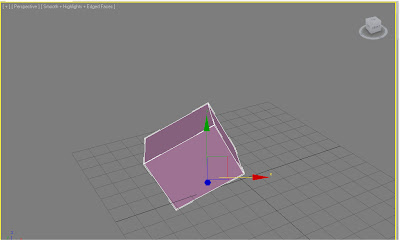
I create a box and as we see it’s axis are pointing for the view directions.
let’s rotate it a little bit and select the move tool again.
as we see the axis still pointing as it was.
So what if we want to move it at it’s right or left, to it’s up or down, to it’s forward and backward?
In this case the ( view ) coordinate system doesn’t work, but if you choose local from the list look how the axis direction changes.
these two are the most important but I’ll explain the others also.
Screen : takes the screen its coordinate system reference.
these two are the most important but I’ll explain the others also.
Screen : takes the screen its coordinate system reference.
Grid : the reference her is the grid.
Pick : allows you to pick an object by clicking on it and it becomes the reference without any linking like in parent.
Now after knowing the most thing of transforming ( moving, rotating and scaling ) object, how can do that very accurate.
SNAPING :-
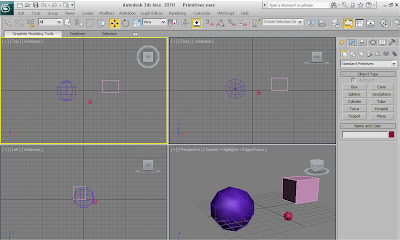
To go with me step by step open the max file ( primitives.max ) which included in the project files.
It’s a simple file, it has two spheres and one box.
Let’s maximize the top view and select the small sphere.
these three buttons are for snapping the objects.
the first one ( snap toggle ) is for the move.
As you can see when we try to move the sphere while snapping is active it snaps to the grid points.
It’s hotkey is S.
but if you want to snap to something else ( another object for example ) go to the snap button and right click.
It allows you to select what you want to snap to so select vertex and deselect grid point, and now it’s no longer snaps to the grid point and it’ll snap to the vertex.
the second snap button is angle snap toggle and from the name it’s clear that it’s for the rotate tool.
It’s hotkey is A.
When it’s active when you rotate the object it snaps for the 5 degree.
to snap for another degree just right click on the angle snap toggle.
you can change the angle to the degree you want.
the third snap button is percent snap toggle and it’s for the scale tool.
When it’s active once you try to scale the object it snaps for the 10 percent.
to snap for another percent just right click on the percent snap toggle.
you can change the percent to the degree you want.
Download the project files from HERE


No comments:
Post a Comment